Showing posts with label Entree. Show all posts

Sunday, March 8, 2015


Sausage Calzones

I'm sorry that I haven't posted for a while. I decided to go back to college and it has consumed 100% of my spare time. I am completing an internship now for a few months, so I can spare the time to do some of the things I enjoy (like baking!).

I have made Italian Calzones before, and have a recipe in my cookbook (using Italian sausage and chopped spinach) that my family has enjoyed for many years. But, I have to tell you - this recipe is not only faster than my original, but it also tops it in taste. This version reminds me of an inside-out sausage pizza! It is moist and flavorful without topping it with any additional sauce.

I adapted this recipe from a recipe called "Lasagna Calzones," by Gerry Speirs, on Pinterest. I made a few adjustments and substituted my favorite homemade pizza dough recipe for the Pillsbury refrigerated crust. Here's my new favorite:

Dough:

1-1/3 c very warm water
2 TB olive oil
3/4 tsp salt
3-1/2 c flour (all-purpose)
1/2 c wheat flour (or use more white)
2 tsp yeast

Filling:

1 TB vegetable oil
1 lb ground Italian pork sausage (I used Jimmy Dean brand)
1 c tomato pasta sauce (I used Prego Italian Sausage & Garlic flavor spaghetti sauce)
1/2 c ricotta cheese
2 c shredded mozzarella cheese (approx. 8 oz)

I put all of the Dough ingredients in a bread machine, set it to the DOUGH setting, and leave it until it is done, about 90 minutes later. However, if you don't have this wonderful machine, you can still make the dough by hand. Combine the wet ingredients, then the dry, then knead in the flours until you have a light and pliable dough. Let rise in a greased bowl, covered, in a warm place until doubled in size, about 1 hour.

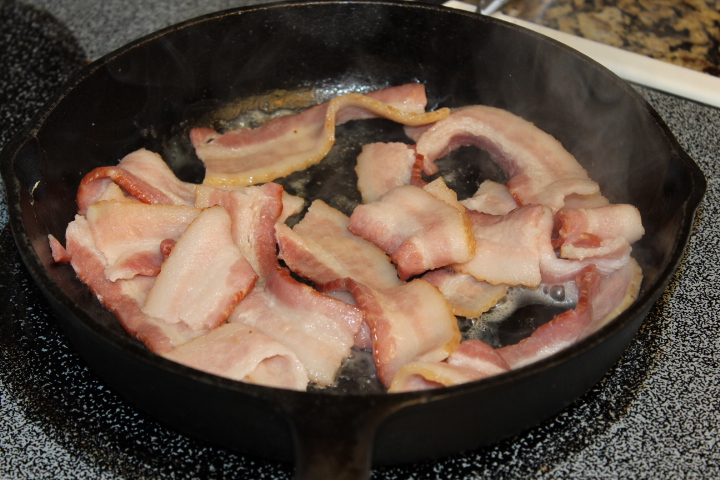
While the dough is rising, you can prepare the filling. Heat the oil in a frying pan or skillet, and add the sausage. Cook, stirring constantly until meat is no longer pink. Remove from heat and add the pasta sauce, ricotta, and 1 cup of the mozzarella. Stir to mix.

Preheat oven to 400 F. degrees. Grease 2 baking sheets and sprinkle them with some cornmeal, if desired. Roll out the pizza dough to 1/4" - 1/2" thick on a floured surface. Cut dough into circles, approximately 6.25" in diameter. I used my Norpro Large Dough Press ($7), like this one at Amazon:

http://www.amazon.com/Norpro-1041-Large-Dough-Dumpling/dp/B000IBP3NK/ref=sr_1_1?ie=UTF8&qid=1425849784&sr=8-1&keywords=norpro+large+dough+press

With the back side of the press, I cut the circles. But you could use a narrow-edged bowl, or cut out a circle of baking/wax paper to use as a pattern. Put 1/8 of the filling into one side of each circle of dough. It measures about 1/4 cup of filling, heaping, for each calzone. Put 2 TB of mozzarella on top of the filling, fold the dough in half, over the filling, bringing edges together to seal. With a moist fingertip, moisten the inside of the edges that will seal. Press edges tightly together in the Dough Press or with a fork.

Put the filled calzones onto prepared baking sheets. Make 2 knife pokes in the top dough each calzone, for steam to escape. Bake them for about 20 minutes, until golden brown. Remove immediately from baking sheet. Serve warm with a side dish of salad for a delicious meal! Makes 8 calzones.

Note: If you rolled the dough too thick and you still have leftover filling, it also tastes great wrapped in a large flour tortilla (like a burrito). Spread a little butter on it, after wrapping, and bake it right alongside the calzones. Crispy and flavorful!

Wednesday, April 3, 2013

Chili Bread - Dinner In a Beautiful Package


Chili Bread is one of our favorite meals! It tastes great and looks fantastic too. The best part is - it's not at all difficult to make.


I'll include the recipe for my white bread dough, but if you're in a hurry, Rhoades or any other prepared bread dough will be a quick way to get this meal to the table. 

I got this recipe at a Bosch bread-making class. There are a lot of variations you could make for the filling. In fact, whatever sounds good as a filling (as long as it's cooked, and not too thin) should work. (The cream cheese seals the inside bottom of the braid so that it doesn't get soggy.) Some variations that I have thought of are:

Pizza: thin layer of cream cheese, pizza sauce, pepperoni, sauteed peppers and onions, cheese, pineapple, and olives.
Calzone: Sausage, ricotta cheese, spinach, shredded Parmesan cheese, and seasonings.
Broccoli/Cheese: thin layer of cream cheese, steamed & drained broccoli, and thick cheese sauce.
Spaghetti: thin layer of cream cheese, spaghetti with thick sauce, mozzarella cheese. Coat exterior of bread braid with egg white, parmesan cheese, dried parsley, and garlic powder.
Chili Bread is still my favorite, though!

Chili Bread


 Yield: 6-8 servings
           1          Recipe white or wheat bread dough (2 lb loaf)
           3-4  oz Cream Cheese, softened
           1  can  Chili with beans
           1  can  Diced green chilies
          ¾  c       Sour cream
                        Grated cheddar cheese (opt.)
          1   can Sliced olives

Prepare your own bread dough (see recipe below), or buy frozen bread dough and thaw it. Preheat oven to 350 F.

After the first rise, roll dough onto large greased cookie sheet (half-sheet cake pan). Roll it ¼-½" thick. 

Down the lengthwise center third of the dough, spread the cream cheese. Spread chili over the cream. Sprinkle the diced chilies over the chili beans. Spoon sour cream evenly on top. Sprinkle with grated cheddar cheese and olives.

Create the “braid” by folding up the short ends of the rectangle over the filling and cutting the long sides of the rectangle into 1½" strips. Fold the strips over the filling, alternating sides and pulling the dough to overlap in the middle, so that it looks braided. If desired, brush dough with egg wash (whisked egg with a little water).

Bake at 350 F. for 20-30 minutes (longer for wheat dough), until bread starts to brown and looks done. Serve in slices, with lettuce and tomatoes.

White Bread – Pillsbury
Yield: 1 Loaf
1⅛ c Milk (1 cup plus 2 TB)
2 TB Oil
3½ c Flour
2 TB Sugar
1½ ts Salt
1 TB Active dry yeast (1 pkg)
1 Egg

If you have a bread machine, just put all of the ingredients into the pan, liquid first. Then set on DOUGH setting until done. 

If not, heat milk and oil until very warm (120 to 130 F.). In large bowl, blend warm liquid, 2 cups flour, sugar, salt, yeast and egg at low speed until moistened. Beat 3 minutes at medium speed. By hand, stir in remaining flour to form a soft dough. On well-floured surface, knead until smooth and elastic, about 10 minutes (or 15 minutes in mixer.) Place dough in greased bowl; turn greased-side up. Cover; let rise in warm place until light and doubled in size, 45 to 60 minutes.

If you are making Chili Bread, continue with directions above.

If you are making a regular loaf of bread, generously grease (not oil) a 9x5 or 8x4-inch loaf pan. Punch down dough; and shape into 1 loaf. Place in prepared pan. Cover; let rise in warm place until light, 30 to 45 minutes. Heat oven to 350 F. Bake 40 to 45 minutes or until golden brown and loaf sounds hollow when lightly tapped. Immediately remove from pan; cool. If desired, brush warm loaf with melted margarine or butter. 

Tuesday, March 19, 2013

Sweet & Sour - So Tasty!

My husband has been making this delicious Sweet & Sour sauce since 1979, before he and I had even met. So, I have no idea where the recipe originated. But I do know that it has been a favorite at our house for many years!

The ingredients are basic and easy to find. The only preparation that takes a bit of time is preparing/cooking the meat, and steaming the rice. For the meat, you could marinate and saute' thin strips of beef, you could cook chicken in a variety of ways, use ground pork or beef in homemade meatballs, or use frozen pre-cooked meatballs. I'll include instructions for using chicken or homemade meatballs today.

Sweet & Sour Chicken

Yield: about 6 servings

1 lb  Chicken
1      Onion, large diced
1      Green pepper, large diced
1/2 c Water
1 c     Ketchup
1 can Pineapple chunks (20-oz), drained; reserve juice
1/2 c Vinegar
3/4 c Sugar
1 ts    Salt
1 dash Pepper, to taste
2 TB   Cornstarch
3 TB   Cold water
4 c      Hot, cooked rice

Boil chicken in water or broth until tender, about 45 minutes. De-bone chicken and cut into bite-size pieces. In large frying pan, saute' chicken pieces with onion and green pepper, adding a little vegetable or olive oil if needed to prevent sticking. Cook until vegetables are tender. In separate pan, combine 1/2 cup water, ketchup, pineapple juice (reserved from drained pineapple chunks), vinegar, sugar, salt, and pepper. Simmer, stirring occasionally until hot and bubbly. Add sauce to meat and vegetables. Add pineapple chunks. [note: combine ingredients in whichever pan is larger - your saucepan or your frying pan.] Dissolve cornstarch in 3 tablespoons of cold water, and add to the sauce. Bring it to a boil, stirring constantly, until thickened. Serve immediately over hot, cooked rice.

Homemade Meatballs

1 lb    Extra-lean ground beef or pork
2 TB  Dehydrated onion (you can use fresh, but the onion flavor will be strong)
1/4 ts Pepper
1 ts    Kosher salt
1        Egg, beaten
1/4 c Bread crumbs

Combine meatball ingredients in a medium bowl until thoroughly combined. Using a cookie-scoop, shape into 1-inch balls and place on a baking sheet lined with aluminum foil and sprayed with nonstick cooking spray. Place under oven broiler for 5-7 minutes or until meatballs begin to brown. You could also use a toaster oven to brown them. Add meatballs to Sweet & Sour sauce, and simmer for 20 minutes, stirring often, to completely cook the meatballs. Then add the cornstarch-water mixture (see above) to thicken the sauce.

Enjoy!!

Wednesday, March 6, 2013

Thai-style Garlic Peanut Chicken


On Pinterest I found a recipe titled, P.F. Chang's Lettuce Wraps, Adapted from CD Kitchen Recipe. It looked good, so I tried it for dinner last week. The lettuce-wrapping didn't work for me at all. It tasted good with the lettuce, but my lettuce just fell apart. So we ended up eating the chicken mixture with rice and pieces of torn lettuce. Not as elegant, but much easier to eat. We also ate leftovers wrapped in a flour tortilla - also very good! In fact, the flavor seemed to be even better after a day or two in the fridge. 

Not being a Thai connoisseur, I wasn't sure what product to buy for the ingredient, "Chili Garlic Sauce." We also no longer live in a mecca of ethnic foods. In looking over the row of chili sauces at the local Fred Meyer store, I decided to avoid the ones that said "sweet," and I picked the one pictured above - A Taste of Thai's Garlic Chili Pepper Sauce. It was delicious! I don't like food that is very hot, gives me heartburn, or leaves my throat burning, so this was perfect for me. My husband loves hot food, so he added some Sriracha HOT Chili Sauce to his own plate. And we were both happy! Even the children loved it (Note: They are not picky eaters). 

The other preparation problem I ran into was that I couldn't find Ground Chicken Breast at the grocery store. I settled for Ground Turkey - 1 lb Ground Turkey Breast, and 1 lb Ground Turkey. After tasting this dish, I don't think the type of meat matters too much. I think you could make it with chicken, turkey, or even ground pork (not sausage). 


Thai-style Garlic Peanut Chicken

Yield: 4-6 servings
2 lb Ground Chicken breast (or turkey or pork)
1  Medium onion, minced
1/2 tsp Salt
1/4 tsp Pepper
4  Large garlic cloves, minced
1 rounded TB Fresh-grated ginger
2 TB Sesame oil
5 TB Soy sauce
1 TB Water
2 TB Peanut butter
1 TB Honey
2 TB + 2 tsp Rice vinegar, unseasoned
3 TB Chili garlic sauce (or more to taste) - I use A Taste of Thai Garlic Chili Pepper Sauce
Dash Fresh-ground pepper
6  Green onions, chopped
1 can (8 oz) Sliced water chestnuts, drained & chopped
1/2 C Roasted peanuts, chopped (salted or unsalted)
10 large Lettuce leaves, torn (opt.)
Steamed rice

Heat a large, non-stick skillet on high. Add chicken, onion, salt & pepper, then cook until chicken is nearly done, stirring often to break up the meat. Add garlic and ginger. Continue cooking until chicken is no longer pink.

Heat together in small saucepan or in microwave - soy sauce, vinegar, oil, peanut butter, water, honey, chili sauce and pepper, until warm and smooth. Add to the skillet and stir to combine.

Add green onions and water chestnuts to skillet, then cook for 1-2 minutes until the onions are soft and water chestnuts are heated through. Sprinkle with chopped peanuts. Serve with rice, torn lettuce, and additional Garlic Chili Sauce, if desired. 

Alternately, serve over linguine-type pasta or wrapped in warmed flour tortillas. Enjoy! Leftovers taste great too!

Quiche Lorraine - Not Just for Breakfast!

Gathering ingredients
At our house, we often like to have "breakfast" foods for dinner. I'm not sure where I got this Quiche recipe, but I've used it for years and it always turns out delicious.

Simmering bacon
The time-consuming part for me is making the pie crust. I could just buy a crust, but I'm addicted to the delectable flavor of homemade pie crust. In my younger years, I made pie crusts that looked beautiful, but were a bit tough - not as light and flaky as I like. I have learned to make a flaky crust, by using less water, but I admit that it doesn't look very beautiful.... 

Maybe someday I'll be able to make a crust that is both beautiful AND light and flaky.

Bacon, cheese, & onions in pie shell

Quiche Lorraine

9" Pie crust, unbaked
1/2 lb Bacon, crisped & crumbled
4 oz Swiss cheese, grated
1/3 C Minced onion
4  Eggs
2 C Whipping cream or light cream
3/4 tsp Salt
1/4 tsp Sugar
1/8 tsp Cayenne red pepper

Heat oven to 425 F. degrees. Prepare the pastry. Cook and crumble the bacon. Sprinkle bacon, cheese, and onion in pastry shell. In a bowl, beat eggs slightly and blend in the remaining ingredients. Pour cream mixture into pie pan.

Ready for the oven
Bake 15 minutes; then reduce heat to 300 F. and bake 30 minutes, or until knife inserted 1" from edge comes out clean. Let pie rest 10 minutes before cutting and serving. 
Serves about 6

Mmm! Looks & smells delicious!

 Pie Crust

1 C Flour
1/2 tsp Salt
1/3 C Shortening
2-1/2 to 3-1/2 TB Cold water

In medium bowl, combine flour and salt. Using pastry blender, cut in shortening until particles are the size of small peas. Sprinkle flour mixture with water, 1 tablespoon at a time, while tossing and mixing lightly with a fork. Add water just until dough is moist enough to hold together.

Form dough into a ball. Place on well-floured surface. Flatten ball slightly; smooth edges. Roll dough to a cirlce 1" larger than inverted 9" pan. Ease crust carefully into pan. Press in place. Trim edges and crinkle or mold edge as desired.

Serves about 6